iTest 1.4 documentation: iTestServer
Introduction
iTestServer offers an easy way to organise a database of questions and answers. It makes use of colours in a way that makes this even easier. It features a simple rich text editor that allows you to format your questions just the way you like.
iTestServer is also used as the server, to which client computers then connect in order to retrieve a test. It can save test sessions for later viewing and allows you to view and print statistics.
User interface

The menu bar provides access to different actions, like opening, saving and closing a database in the File menu, actions related to the current view and language in the View menu, database statistics and other database-related actions in the Database menu or a link to this documentation and an update checker in the Help menu.
The tool bar features icons for actions that can also be found in the menus. The most notable ones are the five checkable icons which follow the Save button. You can use these to switch view to editing questions (Questions), writing notes (Comments), creating flags (Flags), configuring and running the server (Server mode) and viewing saved sessions (Saved sessions). Of course, this only works when a database is open:

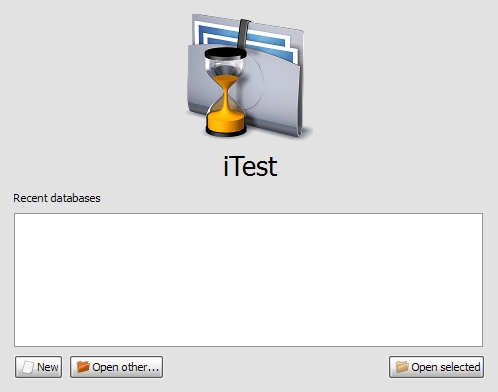
The middle part of the window features a list of recently used databases:
Creating a database
To create a new database, click the New button in the File menu, in the tool bar or under the list of recent databases. Type in a name for the database. Please choose wisely, this name shouldn't be too long and should represent the content of the database well. After this, choose a name for the database file.
You can always change the database name here (although it's not recommended):

The database also contains a date, which you can set to be the date of the last save, or to stay the same permanently (this is useful, if you want to keep the date when you created the database).

Editing questions
To create a new question, you can either go to the Question menu and click Add, or click Add in the tool bar or below the list of questions. Type in a name for the question - this name should not give a hint about the answer of the question. It should be a unique, descriptive name for the question which will remind you about the topic of the question.
The new question will appear in the list of questions:
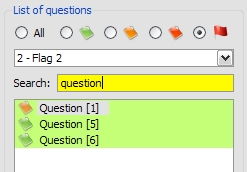
This list can be filtered, which is useful when you have a lot of questions, maybe even hundreds of them. There are 5 radio buttons in the top. The first of them that says All shows all questions (unless the Search field is yellow or red), the second one with the green icon shows easy questions only, the third button (the orange one) questions with medium difficulty only, the fourth (the red one) difficult questions only and finally the fifth with the flag icon shows questions with a selected flag only (you can select the flag in the combo box below it). If you type a keyword into the Search field, it turns yellow if any question matches your search or red if none found.

Below the list, there are several buttons. They are shortcuts for actions located in the Question menu. They mean Add, Duplicate, Delete, Move up and Move down, respectively.
When you select a question to edit, it will appear on the right side of this list, in a section called Selected question. Here you can type in the text of the question, its answers and select the correct one(s).
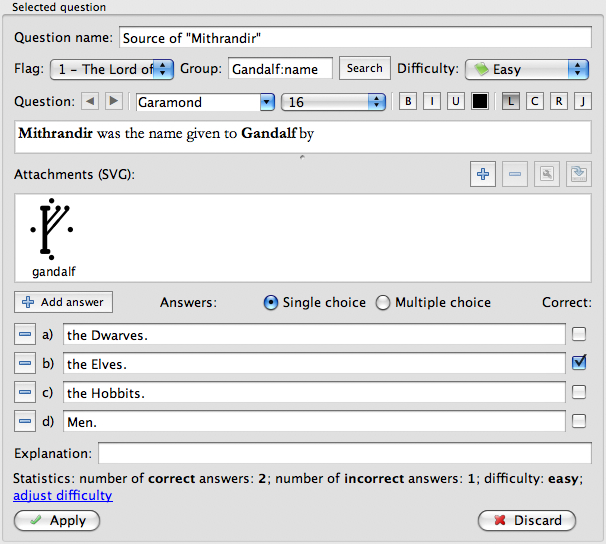
The topmost part of this section allows you to change its name, flag and difficulty:

Below this, you can see the basic formatting tools. The first two buttons allow you to revert the last action (left arrow) or redo a reverted action (right arrow). There's one combo box for choosing a font and one for the font size. Then there are buttons for switching to bold (B), italic (I) and underlined (U) text. Next to these, there is a button for choosing the colour of the text. And finally, L stands for align left, C for centre, R for right and J for justify.

Attachments allow you to add graphics (Scalable Vector Graphics) to questions. You can use programmes such as Inkscape to create an SVG and then import it into iTest by clicking the plus button. To remove an attachment, select it and click the minus button. If you need to change an SVG item (either its name or the actual image), click the edit button located next to the minus button. The last button in the row allows you to export an SVG from iTest, which is useful if you've deleted the original SVG file and want to make changes to it. SVG support was introduced in iTest 1.3.

Do not forget to click Apply or Save after any change you make to a question, because otherwise it will not be saved.
Printing questions and tests
When you've created a database with several questions, you may want to print them. In order to do so, go to the Database menu and select Print questions. A window will show up:
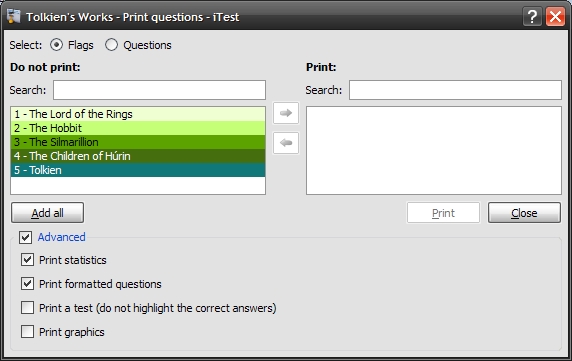
If you want all questions to be printed, simply click Add all. If you want to print questions with a specific flag or flags, select Flags (this is the default) and double click the desired flags. If you want to select questions to print manually, select Questions and double click any question you want to print.
If you want to specify advanced options, check the checkbox labelled Advanced. If Print statistics is checked, statistics will be printed for each question which has already been used in a test. If you want to disable formatting, uncheck Print formatted questions. If you want to use the print-outs for testing purposes, be sure to check Print a test. This way, correct answers will not be highlighted. Lastly, if you want to print SVG attachments, check Print graphics.
Support for printing was introduced in iTest 1.3.
Comments
Use comments to write down anything you want. This could be reminders, notes, to-dos and so on. Comments are saved within the database file and are therefore unique for each database.
You can even use the formatting tools to make your notes look better:

Using flags
Imagine you have a database of questions from biology. These need to be divided into several categories, for example fauna and flora. You can do this with flags.
To create a new flag, click a checkbox next to an empty field.

Next, type in a name. "Biology - fauna" is a good example. If this is the first flag you created, all questions will automatically be assigned this flag. If there are any questions assigned, you can no longer disable the flag (because it is "in use").

Each flag has a different colour and any question with that flag has the same colour as well. Flags are also useful when you want to set up a test with only those questions that are assigned a certain flag.
Setting up a server
To hold a test session, you will need to set up the server. It is recommended to have a printer connected to this server. Click the Server mode button in the tool bar.
- Now you have several options. You can:
- set up a session using all the questions in the database.
Leave the Advanced checkbox unchecked.  Proceed to step 2. Proceed to step 2.
- set up a session using only those questions, which have a certain flag or flags.
Check the Advanced checkbox.  Select flags. Select flags. 
Move those flags, which you want to use in the test, into the Used list by selecting them and clicking the right arrow. 
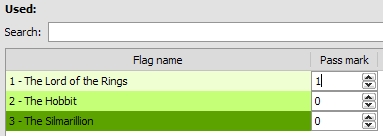
If you want, you can also set a separate pass mark (i.e. minimum number of correct answers to pass the test) for each flag. iTest will make sure each student is asked a sufficient amount of questions with a flag for which a pass mark is specified (a value higher than 0), so that each student has a chance to pass. To pass the test, each condition must be fulfilled, that means all the pass marks specified here and the global pass mark (see step 2). This feature was introduced in iTest 1.2.
- set up a session using only manually selected questions.
Check the Advanced checkbox. Select questions. Select questions. 
Move those questions, which you want to use in the test, into the Used list by selecting them and clicking the right arrow. 
- Below, there are several parameters to set.
- Test name: Unless you want to specify a custom test name, you may leave the checkbox unchecked. The database name will be used as the test name. However, if you do want to specify a custom test name, check the checkbox and type in a name into the field next to it.

- Number of questions: Here you can choose the number of questions each student will be asked. The questions will be chosen automatically (limited only by your settings from step 1), different for each student (if not possible, at least in a different order). You may also choose to use all available questions by selecting "maximum".

- Groups: Check this checkbox to allow a single question per group to appear in one test only. This means that once a question from a group is randomly chosen, no other questions from the same group may be chosen. If you have some groups with more questions, checking this checkbox will cause the maximum number of questions to decrease, because each group then acts as a single question. This feature was introduced in iTest 1.2.

- Pass mark: Here you can choose the minimum number of correct answers the student must have in order to pass the exam.

- Time: You may choose to specify a certain exam time by selecting "(Time for) the whole test" and specifying the time. However, you can also specify the time per question, which will then be multiplied by the number of questions in the test in order to obtain the total exam time. This is useful, when you want to say, that students should have, say, one minute for each question. This will not prevent the students from using 1 minute 30 seconds of their time for one question and 30 seconds for another.

- You are now ready to start the server. Click the Start server button or go to the Server menu and select Start server.
- If you haven't configured the printer yet, you will be asked to do so. When you select the printer to use and configure it, you will have to click Print. Don't worry, nothing will be printed yet. This setting will be used when the students finish their tests, in order to print the results. Everything is done automatically, you will be informed about any activity of the printer via the server log.
If you don't want to print the results and you want to keep them in an electronic form instead (so that you can mail them to the students, for instance), you can use software like PDF Creator (free), Adobe Acrobat or Macromedia FlashPaper (probably the most suitable) and configure iTest to use the virtual printer they provide. Please note that this is only needed under Windows. Computers running Mac OS X and most Linux distributions can create PDF files out-of-the-box.
- Now you may connect client computers. See the iTestClient documentation for details on how to do this.
Off-line usage
In case there is no network available, you will need to load the test into each client computer manually:
- Set up a server the normal way.
- Export a test by going to the Server menu and selecting Export test. Save it to a flash disk or any other kind of removable media. Do not stop the server now!
- Plug the media into a client computer.
- Under Windows, you can open the Explorer window, go to the folder with your exported test and double click the file. Once it is loaded into iTestClient, you may unplug the media (it is no longer needed) and do the same with the rest of the client computers.
- Under any other operating system (and Windows, if you prefer this way), run iTestClient, manually locate the file on the media and load it. Once it is loaded into iTestClient, you may unplug the media (it is no longer needed) and do the same with the rest of the client computers. For further details on how to do this, see the iTestClient documentation.
- When the students finish their tests, plug the removable media into each client computer and copy the file, which was generated by iTestClient. By default, it is located in the home directory (under Windows, this is something like C:\Documents and settings\User). Preferably, copy all the files from all the client computers into a separate directory on your removable media.
- Plug the removable media into the server. From the Server menu, select Add off-line clients. Select the directory on the removable media with all the clients' files. iTest should load all of them automatically, and their results should be printed. You may now stop the server.
Viewing saved sessions
In order to be able to view past sessions, you need to check the Save session option the Server menu when the server is running. It will then be saved when you stop the server.
To view a session, switch the view to Saved sessions by clicking the icon in the toolbar. You will see the session in the list of sessions. Double click its item in this list. The session will be loaded and ready for viewing.

You can now view the results of a student by clicking a name in the list of students.
Printing
When you're viewing a saved session, you can also print results of a student, of all students or a summary of the session. In orded to do this, go to the Session menu and click one of the first three options, according to what you want to print. You can only print results of a student if a student is selected in the list of students.
Exporting a log
If a session has a log, you can export it as an html document. In order to do this, a session must be loaded. To export a log, go to the Session menu and select the Export log option. Now, choose a name for the file and save it.
Deleting a log
When a session log is no longer needed, you can delete it to save disk space. In order to do this, a session must be loaded. To delete a log, go to the Session menu and select the Delete log option. You will be asked to confirm this action.
Archiving, restoring and copying a session
In iTest 1.1, a new feature called archive was introduced. The archive can store sessions, which are associated with the database by its name. When you open a database, iTest checks if there are any archived sessions under its name. If so, they are all loaded and you can view them. If you open the same database on a different computer, these sessions will not be shown, because they are only available on the computer where you archive them.
Archiving a session is easy, you just need to load the session you wish to archive, go to the Session menu and select Archive session. You'll see the session jump from the list of sessions to the archive.

Restoring a session brings it back into the database. To do so, choose Restore session from the Session menu.
To copy a session to or from the archive, use the appropriate actions in the Session menu.
Using the statistics
iTest remembers every answer of every student, correct or wrong. The number of correct and incorrect answers is saved in the database along with the question. These numbers are used to determine the difficulty of a question. If available, this information is displayed at the bottom of the editor when you select a question.

By clicking "adjust difficulty", the difficulty of the question is set to the calculated one. You can also adjust the difficulty of all questions in your database. In order to do so, select Overall statistics from the Database menu. A window will appear.
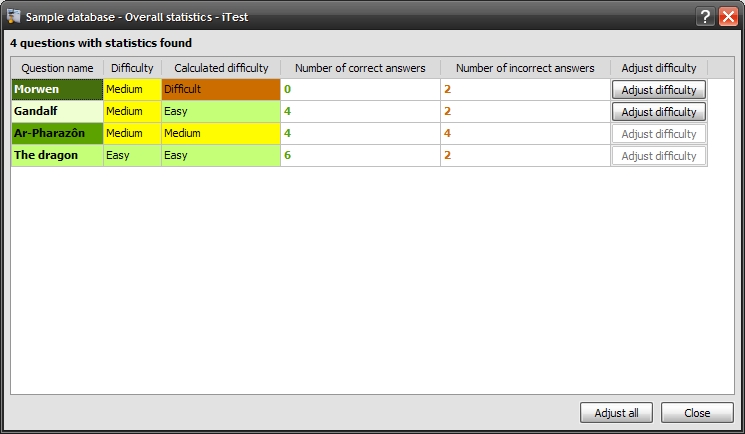
Click Adjust all to change the difficulties of all questions to the calculated ones. You can also change the difficulty of some questions only by clicking the corresponding Adjust difficulty button on the right. |

